
Chef Jeong-sun
Albaechu-mul-kimchi (Baby Cabbage Water Kimchi)
Tender baby napa cabbage in a clear pear-garlic brine, lightly fermented until the broth turns clean and bright, the summer kimchi a beginner can make without a kimjang floor.
A cooking platform built around craft, culture, and the stories behind what we eat.
Created by
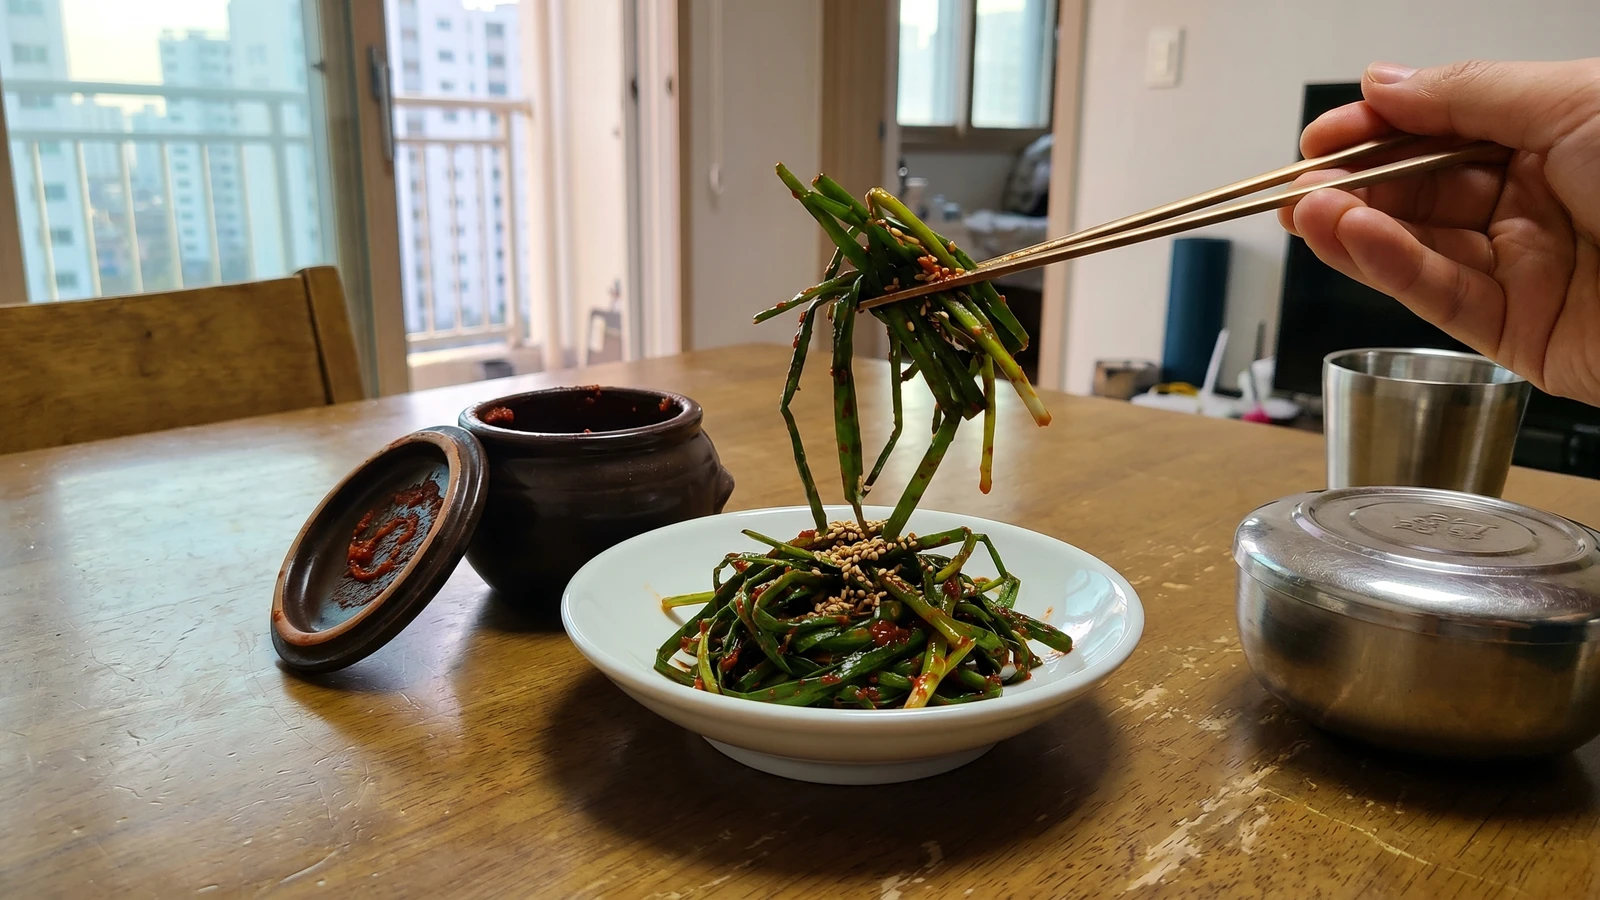
Tender garlic chives dressed without salting, turned gently in anchovy fish sauce, gochugaru, garlic, and sesame, then left just long enough to sharpen into the quick Gyeongsang kimchi a rice bowl wants.
Garlic chives tell you what season you are standing in before the seller does. In spring and early summer the leaves are flat, tender, and dark green; by late summer they get coarser and want a jeon pan more than a kimchi jar. Cook the month you are standing in: buy slender buchu that bends without cracking, and use it the same day.
Buchu-kimchi is a Gyeongsang table dish, quick, sharp, and not shy. It often sits beside pork, gukbap (rice soup), or a bowl of rice when the meal needs one bright, salty green thing. The mistake is treating it like cabbage kimchi. Do not salt it first. Garlic chives have no thick ribs to protect them; salt them first and they surrender before the seasoning reaches the jar.
My teacher had me wash the chives three times and then leave them alone on a towel until they were dry. I was impatient. She only pointed to the wet green streaks in the bowl. Water steals the seasoning, and rough hands bruise the leaves black. Tonight this dish asks for clean washing, patient draining, and gentle turning, nothing grand. Write the amounts down. Memory is a borrowed bowl.
Buchu-kimchi is especially tied to southeastern Korea, where garlic chives are often called jeongguji in Gyeongsang dialect and appear beside pork soup, grilled meat, and everyday rice. It belongs to the quick kimchi family rather than kimjang (winter kimchi making): the chives are not salted first, because their thin leaves collapse quickly, and the fish sauce seasons and wilts them at the same time. Garlic chives grow back after cutting and were a practical, inexpensive market green from spring through autumn, which is why this kimchi was made in small jars and eaten young.
Quantity
450g
trimmed, washed, dried, and cut into 3-inch lengths
Quantity
1/2 medium (80g)
very thinly sliced
Quantity
1/2 small (40g)
cut into fine matchsticks
Quantity
4 tablespoons
Quantity
3 tablespoons
medium-fine
Quantity
1 tablespoon maesil-cheong or 2 teaspoons sugar
Quantity
2 cloves
finely minced
Quantity
1 teaspoon
finely grated
Quantity
1 tablespoon
| Ingredient | Quantity |
|---|---|
| garlic chives (buchu)trimmed, washed, dried, and cut into 3-inch lengths | 450g |
| onionvery thinly sliced | 1/2 medium (80g) |
| carrot (optional)cut into fine matchsticks | 1/2 small (40g) |
| Korean anchovy fish sauce (myeolchi-aekjeot) or sand lance fish sauce (kanari-aekjeot) | 4 tablespoons |
| gochugaru (Korean chili flakes)medium-fine | 3 tablespoons |
| maesil-cheong (green plum syrup) or sugar | 1 tablespoon maesil-cheong or 2 teaspoons sugar |
| garlicfinely minced | 2 cloves |
| fresh gingerfinely grated | 1 teaspoon |
| toasted sesame seeds | 1 tablespoon |
Trim away the tough root ends and any yellow tips from the buchu (garlic chives). Rinse them in a wide basin of cold water, lift them out instead of pouring the grit back over them, and repeat twice more if the water is sandy. Drain well, then spread them on a clean towel for 15 minutes. Wet chives dilute the fish sauce and make the seasoning slide off, so this draining is part of the recipe, not waiting around.
Cut the dry chives into 3-inch lengths with a sharp knife. Do not chop them small and do not crush them under the blade. Buchu bruises easily, and bruised leaves darken and lose their clean bite before the kimchi has time to ferment.
In a large stainless bowl, stir together the fish sauce, gochugaru, maesil-cheong or sugar, minced garlic, and grated ginger. Let it stand 5 minutes so the gochugaru drinks in the liquid and turns glossy. This is why the seasoning coats the chives instead of falling to the bottom of the jar.
Add the chives, onion, and carrot, if using, to the seasoning. Lift and turn with your fingers from the bottom of the bowl, folding the greens over themselves until everything is lightly stained red. Do not squeeze. The chives should bend and shine, not collapse into a wet knot. Taste one piece after 10 minutes. It should be a little saltier than you want at the table, because fermentation and the chives' own moisture will soften it.
Pack the seasoned chives into a clean 1-quart glass jar or small onggi, folding long pieces in rather than forcing them. Press just enough to remove large air pockets, then scrape every bit of red seasoning from the bowl over the top. Leave 1 inch of headspace. This kimchi ferments quickly, and it needs that room.
Set the loosely covered jar at room temperature for 12 to 18 hours in a cool kitchen, around 20 to 22 C. In a hot kitchen, give it 6 to 8 hours. When the chives smell lightly sour and the jar shows small bubbles at the edges, tighten the lid and refrigerate. It is edible right away as geotjeori (fresh quick kimchi), but the better bowl comes after 2 days in the cold.
Serve a small tangle cold from the jar, with rice, pork soup, grilled meat, or a plain bowl of noodles. Use clean chopsticks every time you take from the jar so it keeps well. After 10 to 14 days it will be sharper and softer, still good beside rich food, but past its clean first character.
1 serving (about 85g)
Culinary guides, cultural storytelling, and the editorial depth that makes cooking meaningful.
Discover Culinary ExplorerChef Jeong-sun
Tender baby napa cabbage in a clear pear-garlic brine, lightly fermented until the broth turns clean and bright, the summer kimchi a beginner can make without a kimjang floor.

Chef Jeong-sun
The kimchi from before chili, salted napa cabbage packed with radish, pear, jujube, and pine nuts in a clear brine that turns quietly tart in the jar.

Chef Jeong-sun
A pale summer cucumber kimchi, split and stuffed with radish and chives, then held in a cool pear brine so the cucumber stays clean, crunchy, and plainly itself.

Chef Jeong-sun
Flat spring bomdong cabbage, lightly brined and tucked into a clear pear-radish kimchi broth, made without chili and eaten young while the leaves still taste like spring.